July 31st, 2020

Beginner’s Guide to Grounded
Getting started with Grounded can be a bit overwhelming and not all features are immediately apparent, so I’ve compiled a list of tips and tricks that helped me get started with a smoother experience. This guide might contain small spoilers (scoped to the existence of certain items), but I’ll do my best to avoid any story-based spoilers to keep things fun and fresh for everyone!
Finding Water
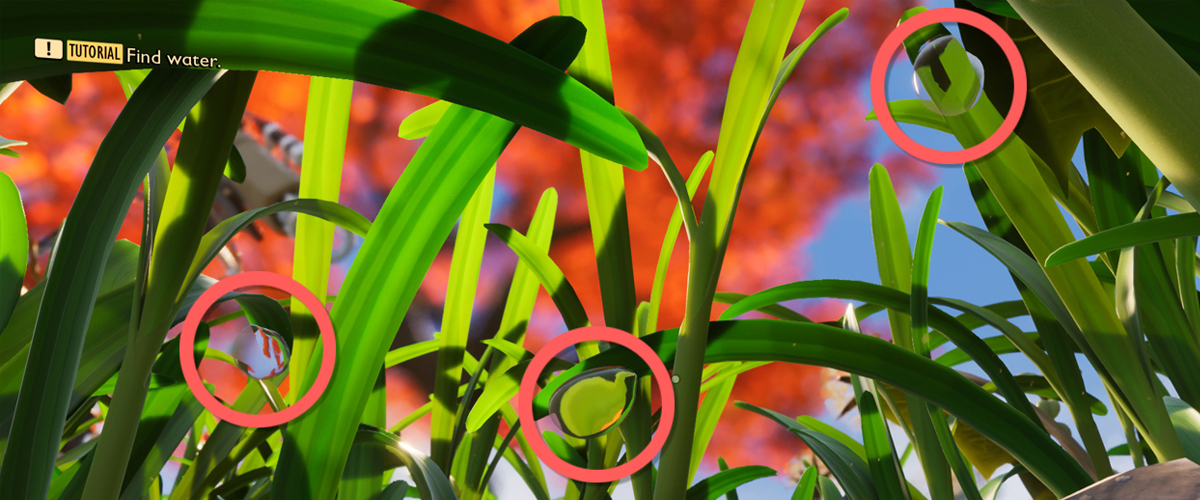
One of the first tasks you’re faced with in Grounded is finding food and water for yourself. While the game prompts you with markers to show you the location of Mushrooms for the food-side of the quest, water isn’t as clearly laid out. There are three main sources of water when you immediately begin playing: Pond Water, Water Droplets, and Juice.
Pond Water is contaminated ground water that you will find in shallow pools among the dirt and mud near your feet. Pond water is not recommended for drinking since it both drains your Health and causes vision distortion. Generally speaking it’s a good idea to steer clear of pond water, but it can work in a pinch.
When looking at pond water, your prompt will read “Slurp…?”, which is a red flag from the devs
Water Droplets are the staple source of water. They’re most-often found suspended on the tips of blades of grass (as seen in the image above), or dangling from plant leaves. To knock these down, hit the base of the plant and it will jostle the water loose, dropping it to the ground. You can also hit them with a thrown rock to practice your aim.
Juice is the best kind of liquid that you can find when getting started in Grounded. It’s found next to giant juice boxes (look for the three-story-tall red box near the Mysterious Machine) and they’re yellowish-green in color. The best part about Juice is that it replenishes both Thirst and Hunger! I build my first base near juice boxes so that I have food/water in the morning.
Be sure to research new materials
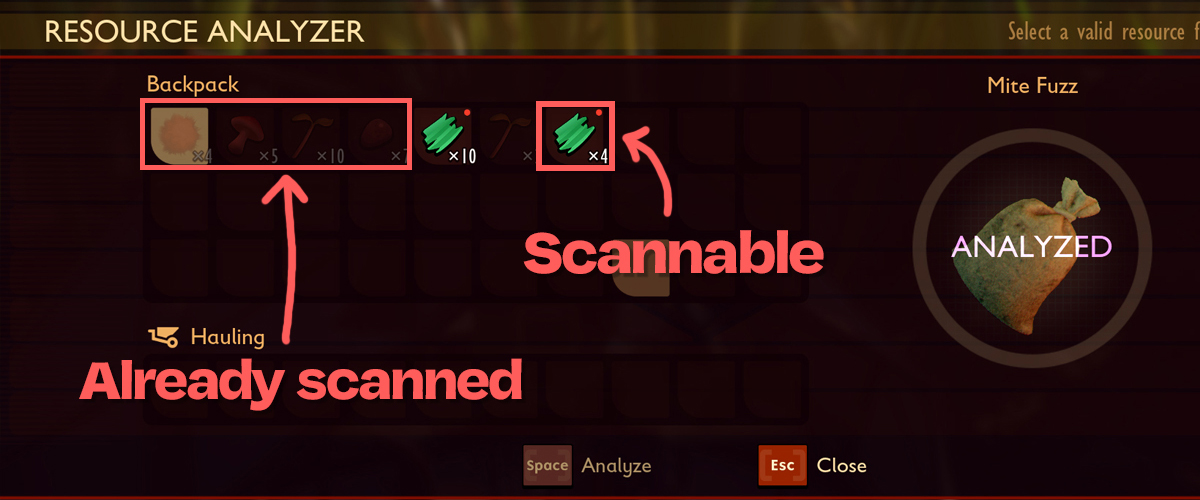
The Resource Analyzer station is introduced to players very early in the game, but it’s easy to forget that it exists and should be visited often. Any time you get a new material, including carried items like Grass Blades and Weed Stems, you should return to the research center and analyze them. Analyzing new materials unlocks new building recipes which use the scanned material, leading to stronger bases and more efficient tools, and new weapons. Not all materials are scannable, and there’s no way to tell if you’ve scanned an item already, so when in doubt always bring an item with you to the scanner, just in case.
The scanner can hold up to 3 charges at a time, at which point the battery in the station will begin recharging itself. It takes about eight-to-ten minutes in real life time for a charge to come back to the station, and there’s no way to speed this process up that I’m aware of. It’s a good idea to use all of your charges, then go back to base-building, foraging, or exploring for a bit while waiting for the station to recharge.
Progress the main story
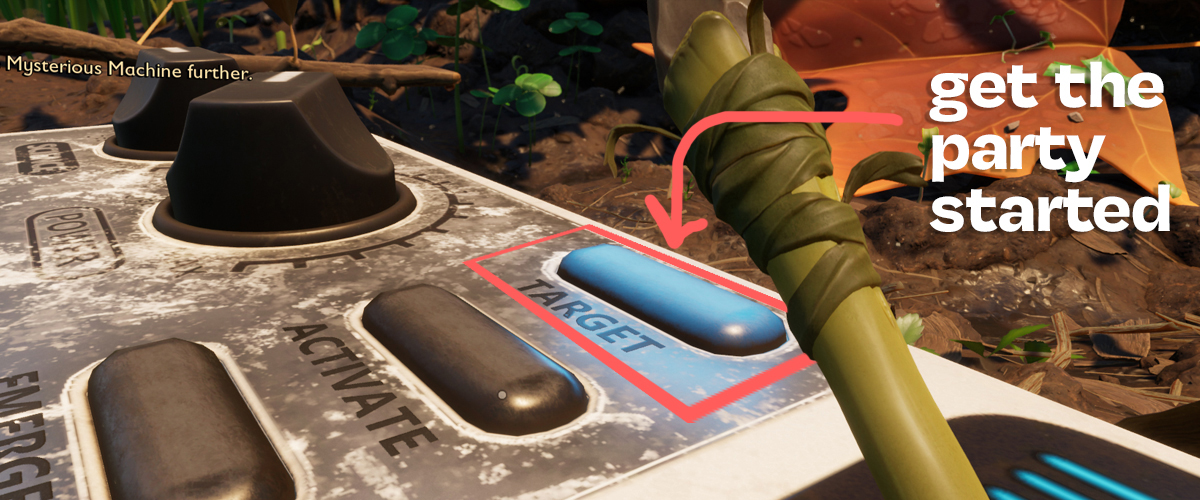
More than anything, be sure to progress the main storyline of the game as you continue to play. The very first mission of the game is to begin investigating the Mysterious Machine, with additional quests to revisit and investigate it further. Every time you need to progress this area, jump on top of the machine and look for the buttons labeled “Target”, “Activate” and “Emergency”. I won’t go into what each button does, but I wanted to outline which parts on the machine you need to activate in order to progress the story. Always be sure to check your quests in the top left if you’re looking for something new to do!
Progressing the main story often pushes you out of your comfort zone and into progressively more difficult areas, but those areas contain new materials which you can then research, giving you access to better tools, weapons, base upgrades, and other nifty buildables.
General Tips and Tricks
There’s so much information in this game, especially since it’s in early access and more content will be continuously added to the game, so this is not a fully exhaustive guide which I’ll wait to create until the game is in a more stable spot with content. That said, I wanted to share some other information which has helped me so far with the game that doesn’t fit under any direct category but could still prove useful for new players.
Explore! Hit new plants! Follow new creatures! Have fun!
Before I jump into some more technical tips and tricks, I want to remind everyone that the magic of survival games is to explore and find new things! Try hitting new plants you’ve never seen (might I suggest chopping down a dandelion and looking at its seeds?), try following bugs around (ants are really fun to follow!), and explore the map as far as you’re comfortable doing. This is a very fun game, and you define your own fun in this game, so follow what your heart tells you to do 🙂
Creatures do not update their attack’s aim after the animation starts.
This means that if you’re fighting a creature whose attack you want to avoid, you can side-step the attack with the correct timing. This is more difficult on larger creatures such as Spiders, who have a wider attack hit area, but for smaller creatures such as Ants, Larvae, and Lady Bugs this is a great tactic to keep in mind. Avoiding attacks is especially helpful when you are first getting started and might not have armor yet.
Grounded is now a Souls-Like, lookout everyone
Make a note of Landmarks.
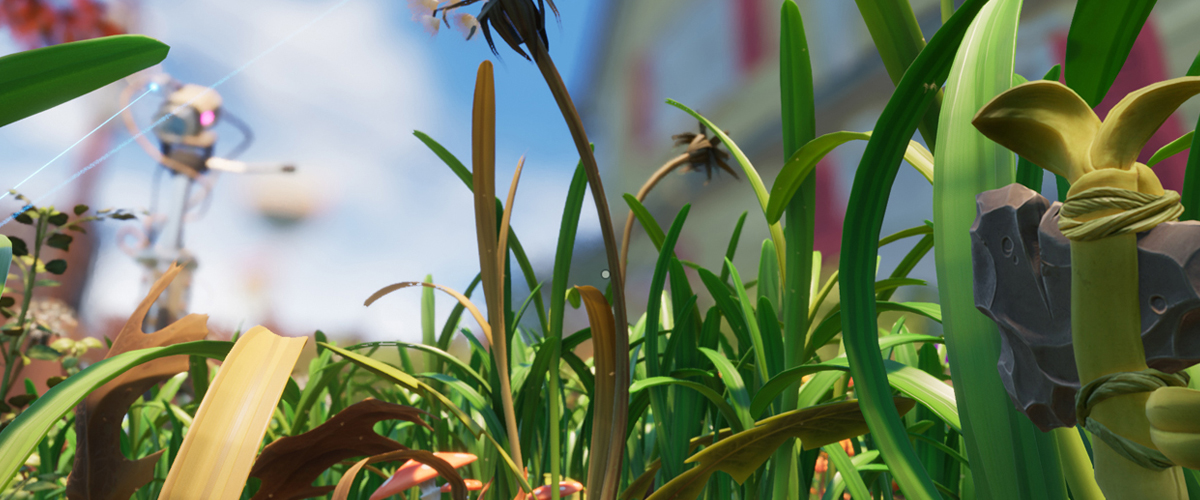
The game has a static map, meaning the map will always be 100% the same every time you start a new character. This is good to know because you can try to remember the location of large objects to help orient yourself in the game better. For example, I love using the three Lasers on tripods, which always point to the Mysterious Machine. Whenever I’m lost, I look for the lasers since they’re extremely tall and visible from most areas on the map (especially if you climb a nearby plant for a high viewpoint).
Use Trail Markers to your advantage.
Trail Markers are placeable waypoints that you can craft after scanning Clover Leaves. They allow you to place a flag in the ground, then to set a custom icon and marker which you can then view from great distances and through walls. These are very powerful tools to help you find your way around, especially powerful for placement at your Base or at Resource Analyzer stations so that you can find your way back to them quickly. Think of them like custom landmarks that you can place wherever you want!
Don’t be afraid to run away.
Not every fight is one you should take. If you feel like you’re getting overwhelmed it’s perfectly ok to turn tail and run away! Every bug I’ve come across has some sort of range at which they’ll drop their focus from you and go back to their own business. If you find yourself in a situation where a bug has found its way into your base and continues to attack you, do your best to run away after respawning and remember you can always build a new base. This is a known “bug” (pardon the pun) and the developers are working on this currently.
Report bugs!
Remember that this game is a work in progress, with new updates coming out regularly to address issues. That said, if you run into issues with the game, be sure to check the official Grounded forums managed by Obsidian in order to see if your bug is experienced by someone else. Help provide feedback and context to how your bug happened in threads which mention it. If your issue hasn’t been reported yet, start up a new post and help improve the game for everyone else! For example, I found a bug where arrows have a chance to fall through the floor after a few seconds, and submitted a bug report for it already. Don’t view this as a bad thing or that the game is ‘broken’, see it as an opportunity to help participate in improving this really neat game for everyone else too!
